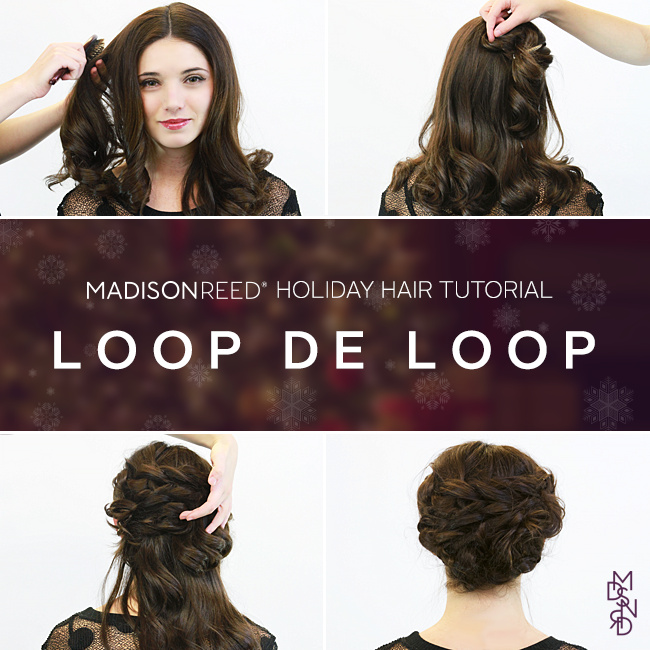
Lavish and Lovely Updo: Loop de Loop
by Natasha Siebert December 18, 2014
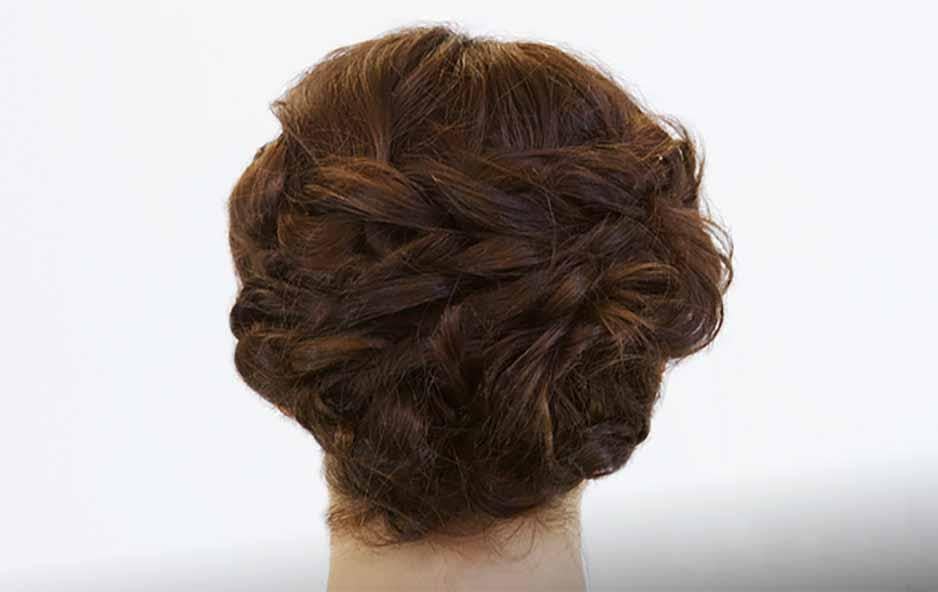
Image by Madison Reed
The holidays are a magical time! From dazzling ‘dos with gorgeous accessories, to this lavishly braided updo, Madison Reed is setting you up with beautiful hair fit for the fairy queen of a winter wonderland.
Designed by certified colorist and Color Crew Specialist, Kellay Jusewicz-Haidle, this advanced Loop de Loop tutorial is best suited for people who are comfortable with multiple styling techniques and steps, or eager to learn. The more hands the merrier, so grab a friend, keep the holiday eggnog flowing, and have a ball!
To create this Updo look, you’ll need:
Heated rollers or curling iron
Bobby pins (match your hair color or insert sparkle with bejeweled pins)
Long smooth hair clips
Decorative touches to suit your style
How to create a Loop de Loop Updo Hairstyle:
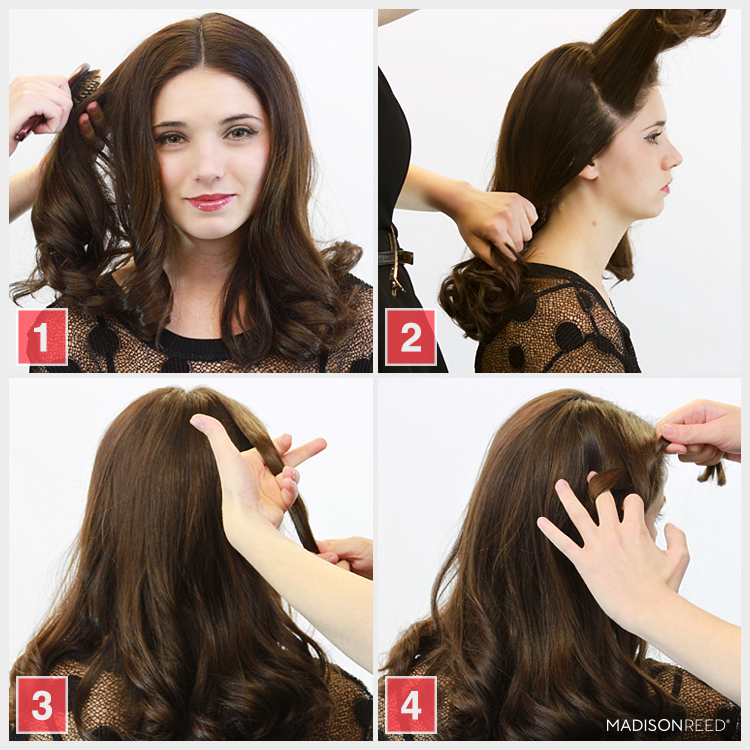
- Add curls to hair with heated rollers or curling iron. Wait until curls are cool, and then softly brush out. Create a lot of texture for this style (it will make the hair much easier to work with).
- Gather your first section of hair from above the right ear to the right side of the middle part. Pull this section straight back and keep a firm grasp to start the first loop.
- Twist hair counter clockwise around your index and middle finger to create a circular loop.
- Pull hair halfway through this circle to create a loose knot.
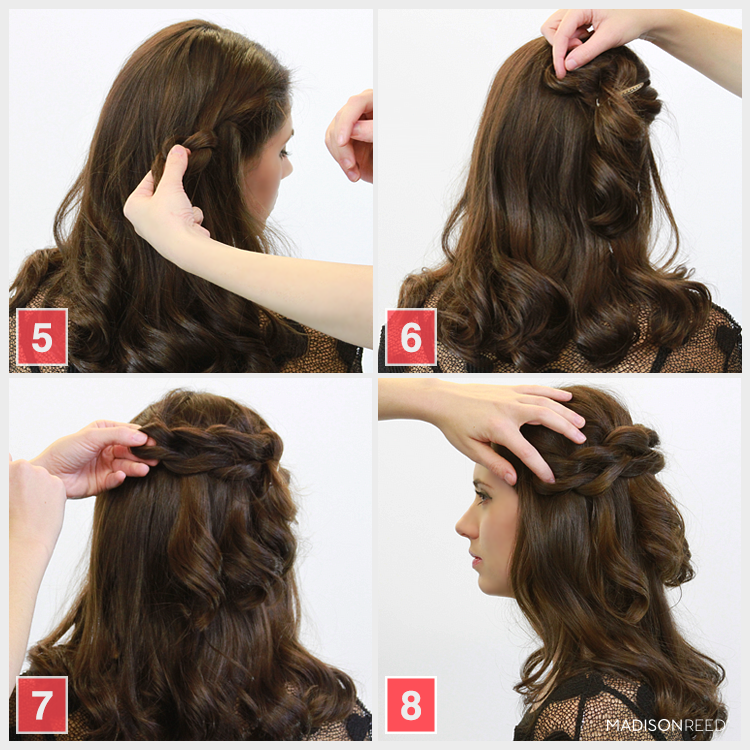
- This is what the first knot-loop should look like. Start using bobby pins to secure the loops and anchor in place. Use bobby pins the same color of your hair for invisible coverage or bejeweled pins to infuse sparkle throughout this style.
- Gather a new section of hair to the left of the first section. Pull new section of hair halfway through the first loop to create a second loose knot. Use long, smooth hair clips to keep hair in place as you work.
- Continue step 6 with new sections of hair, moving your way left to create a chain of loose knots. Move on to step 8 when you reach your left side above the left ear.
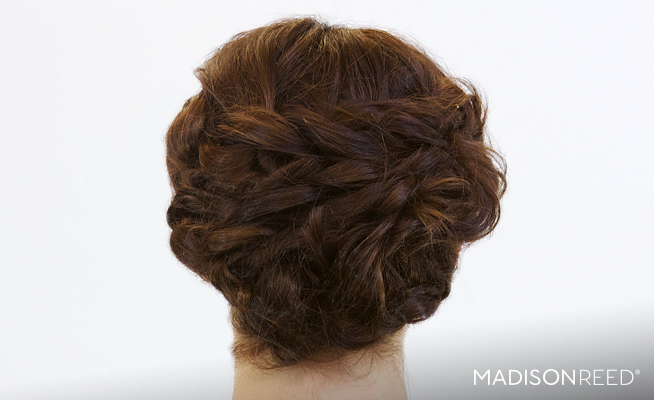
- Now that your first row of loops is complete, let’s start the 2nd tier!
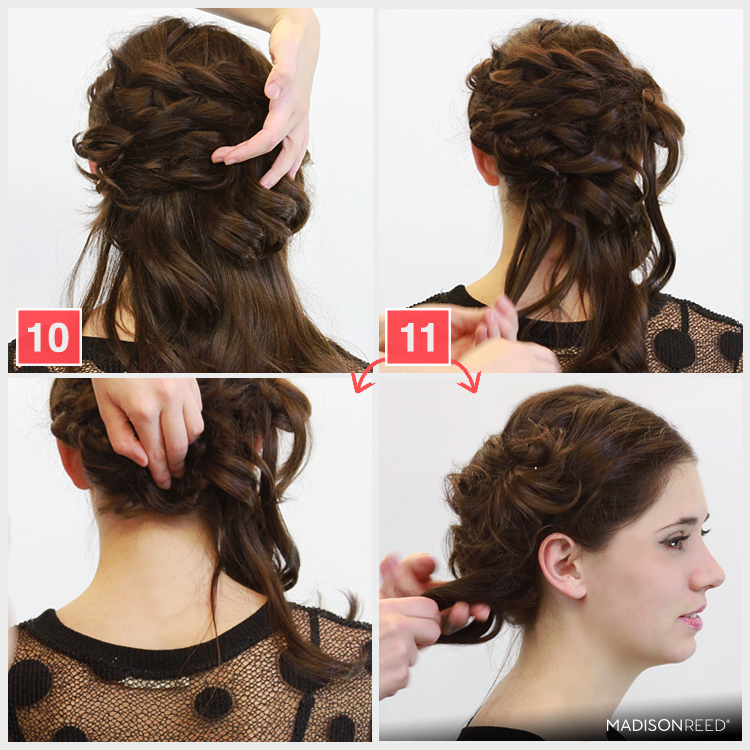
- You should now be working with the hair on your left side, below the left ear. Follow steps 2-3 to create the first knot for this new chain.
- Follow steps 6-7 to continue this chain of loose knots, working towards the right side of your head this time. Keep using bobby pins to secure each loop, and long smooth hair clips when you need extra support as you work. Your second row will be complete when you reach the right side of your head below your right ear.
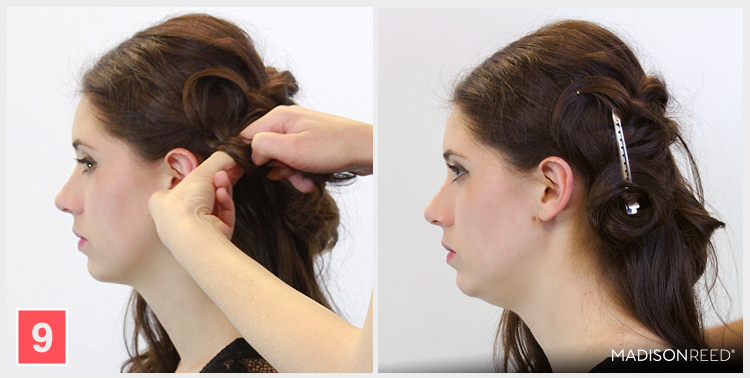
- Now it’s time to style the loose hair on the nape of your neck. Working in 2-inch sections, roll hair around fingers and pin the curl under the second tier of loops. Pin each roll securely with bobby pins.
- Remove the long smooth hair clips. Leave all bobby pins in to keep your lovely look locked in place.
Personalize your lovely Loop de Loop with festive accessories, seasonal touches like a sprig of holly, or let the sophisticated style speak for itself. Now you’re ready to reign supreme over your holiday realm!

Set up for success
Start with second-day hair. The hair is easier to control and shape since it’s not squeaky clean.
Make sure your curls are completely cool. Letting the hair cool will help to set the hair and hold the curls when you brush it out.
Spraying your hands and the bobby pins with hairspray will help you to hold the hair in place. It will be sticky but it will make the styling easier.
Pin like a pro
Place the bobby pin in with the ridged side against the head. This helps the bobby pin to grip the hair more.
Don’t open your bobby pins when you are pinning the hair. Opening the bobby pin makes it grab too much hair, which will loosen the grip.
Use a “threading” motion when putting in the bobby pins, like you’re sewing. It helps the bobby pin fasten very securely.
Insert as many bobby pins as you feel comfortable using. It’s better to have the hair very secure.
Shake, rattle, and roll
Do the rockstar test! Shake your head as much as you can after your look is complete. Don’t be afraid to see if it falls out a bit. You can re-pin any pieces that do fall out. This ensures your updo is the most secure that you could make it and help it last the whole night long!
Looks created by Kellay Jusewicz-Haidle
Hair styled by Kellay Jusewicz-Haidle; modeled by Felicia Terwilliger
Photographed by Natasha Siebert
Trending Now
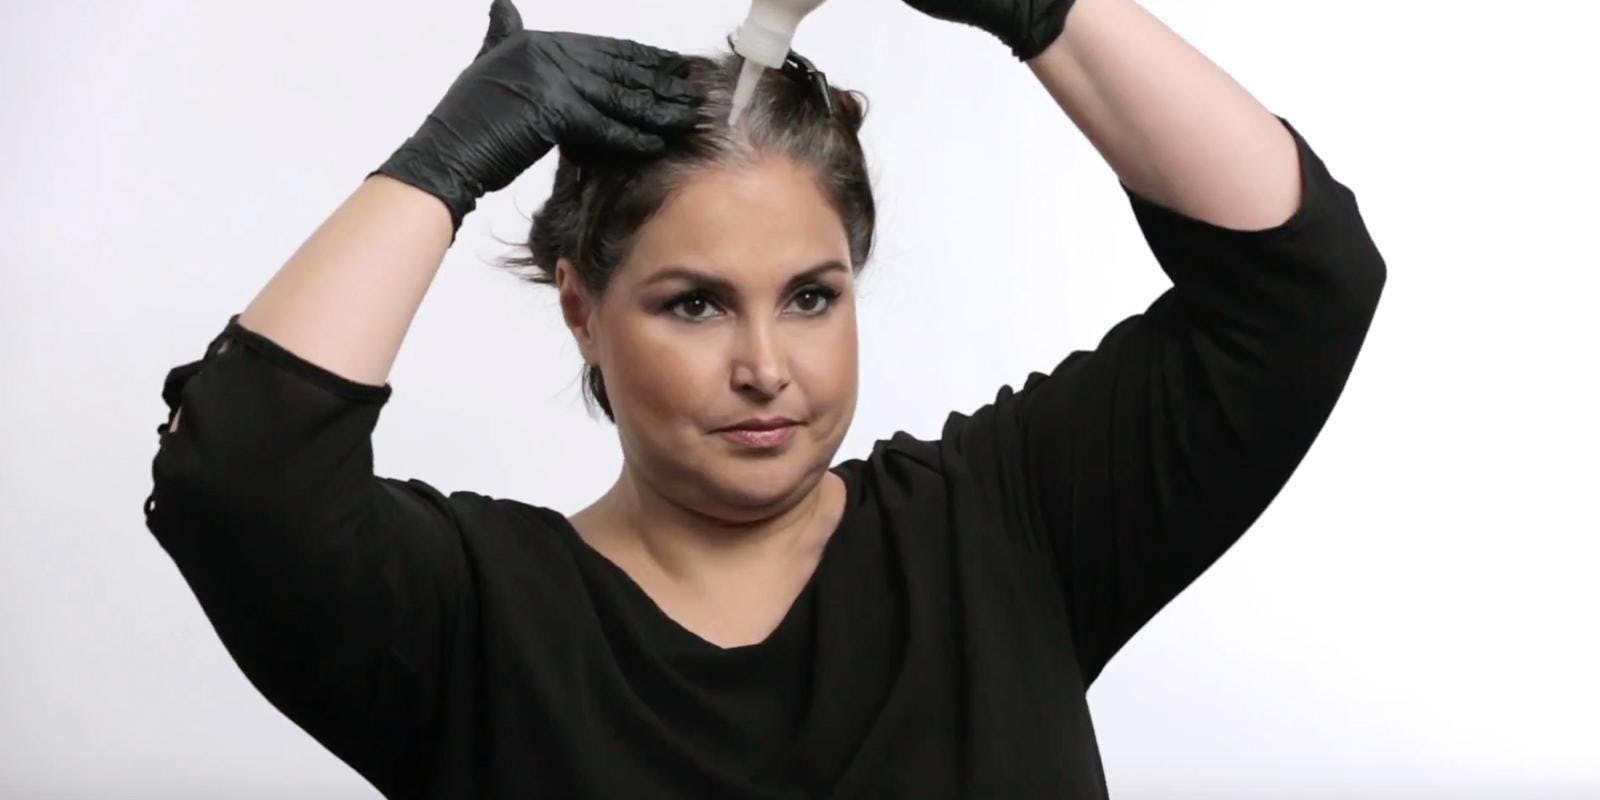
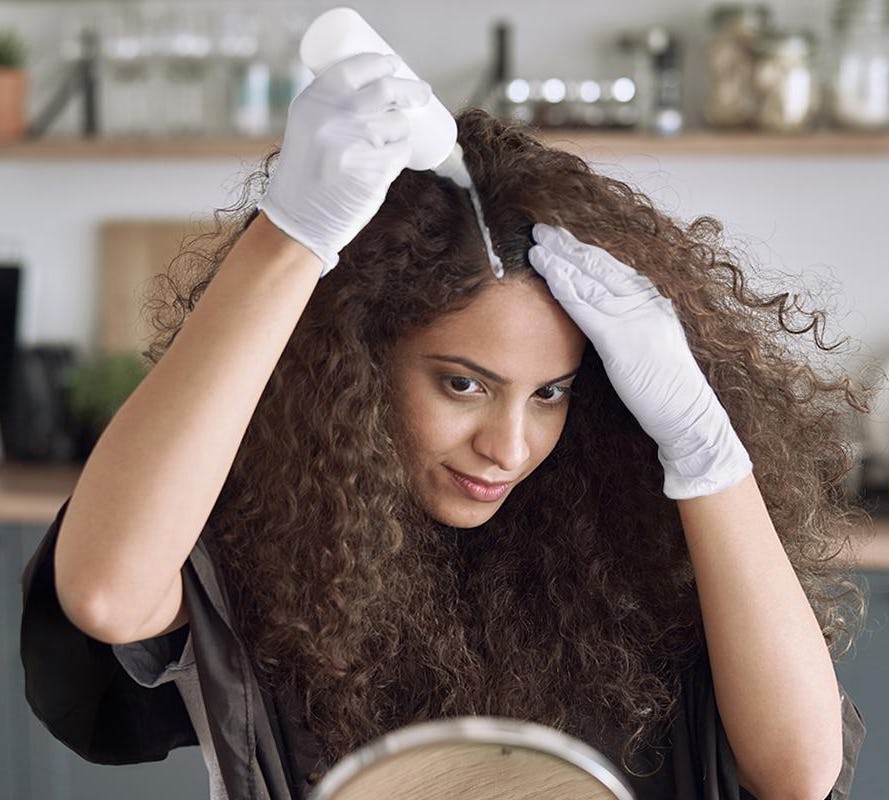
Dear Color Crew: How Can I Cover My Gray Without Coloring the Rest of My Hair?
What's The Difference Between Semi-Permanent & Permanent Hair Color?

What Causes Hair Loss? Reasons & Solutions, Explained

Dear Color Crew: How Do I Color Highlighted Hair?
How and When to Use Hair Gloss
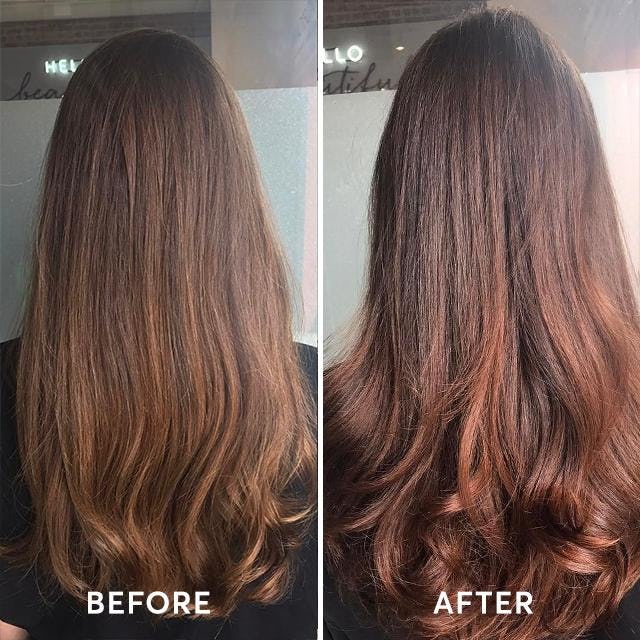
Balayage vs. Highlights Differences: Which Is Best for You? | Madison Reed

It All Starts
With Color

It All Starts
With Color